

Speaker Tab
- iPad
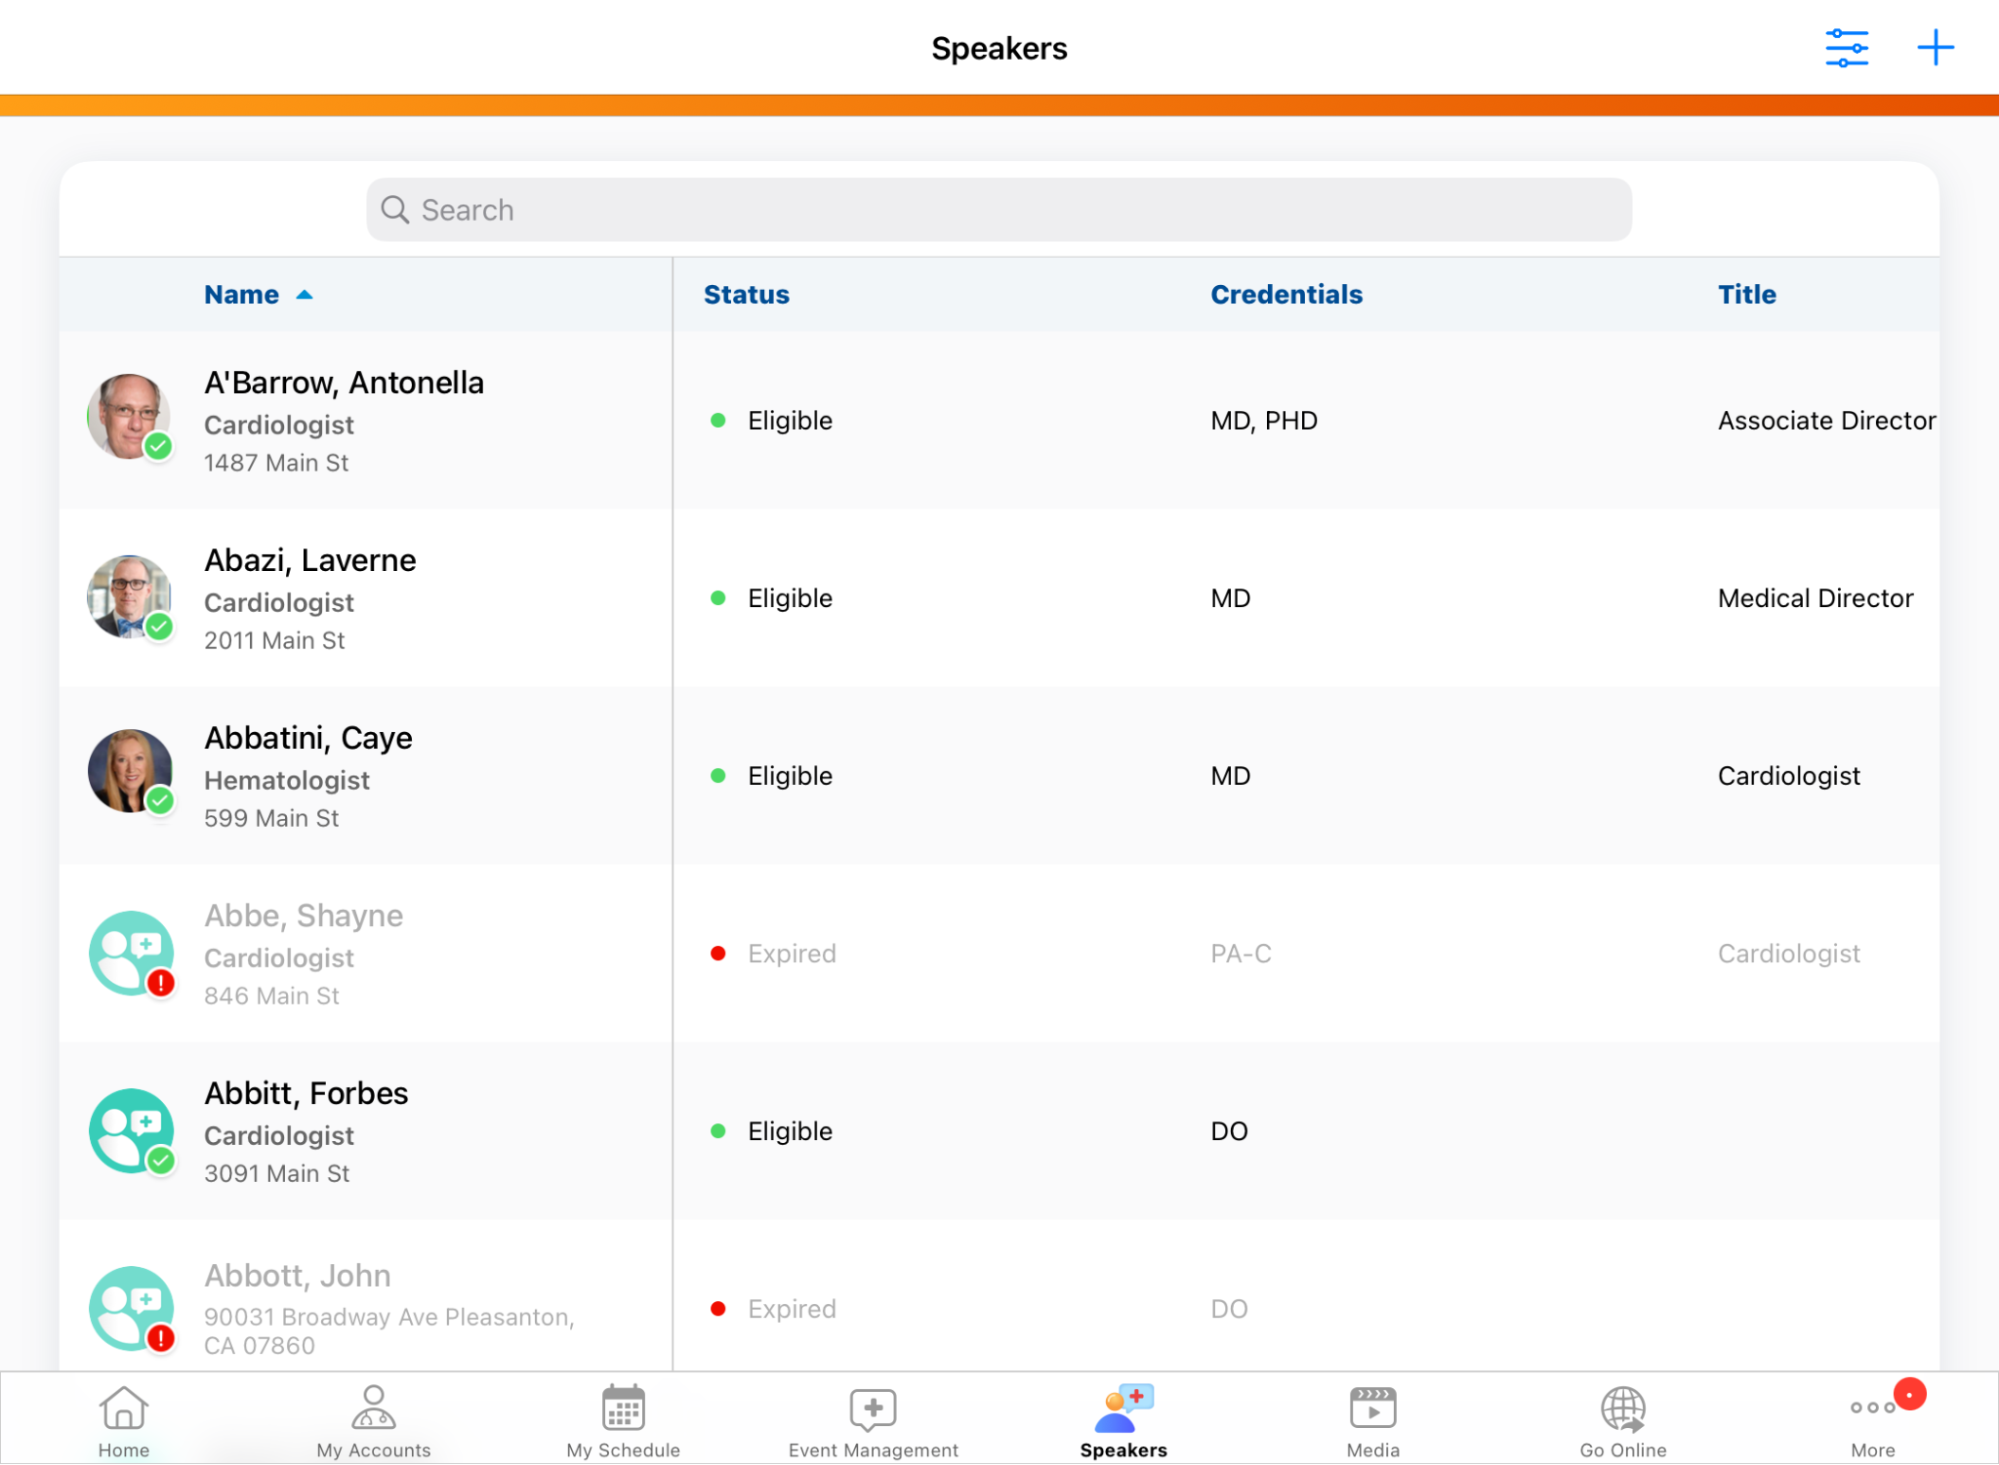
To enable event organizers to easily decide which speaker to choose for an event, the Speaker tab displays a list of all speakers. The Speaker tab displays the availability and eligibility of speakers, as well as common profile attributes such as affiliation, credentials, and specialty.
MyInsights users can create a Speaker Tab visualization. See Creating a MyInsights Page for Speakers for more information.
For example, Alice Adams, an event organizer at Verteo BioPharma, wants to plan a symposium about Cholecap. She navigates to the Speaker tab and quickly searches for several speakers who are trained in the Cholecap topic. After narrowing her selection down to a few potential speakers, she reviews the profile for each to review their eligibility and availability for her event.
Configuring the Speaker Tab
-
Ensure Events Management is configured for all appropriate users.
-
Grant end users the following permissions:
Object OLS Record Types Fields FLS EM_Speaker_vod R n/a Status_vod Read EM_Speaker_Qualification_vod R n/a n/a n/a EM_Catalog_vod R n/a - Status_vod
- Name_vod
Read -
Grant end users access to the EmSpeakerController Apex class.
-
Update the SPEAKER_TAB_COLUMNS_vod Events Management Settings with the list of appropriate EM_Speaker_vod fields to display.
-
The default fields are Status_vod, Title_vod, Credentials_vod, Year_to_Date_Utilization_vod
-
End users must have FLS Read access to any fields listed in this setting
-
-
Manage the Speaker tab order by updating the Veeva Message referenced by the TAB_NAV_DISPLAY setting. This step is optional, but if the TAB_NAV_DISPLAY setting is enabled, the Speaker tab must be added to the list of tabs in the Veeva Message.
If the tab is not enabled, the Speaker tab defaults to displaying after the Medical Events / Events Management tab.
- Populate the Enhanced_Interface_Mode_vod Events Management Setting with 0;1, or with 1;1 if the Events Timeline Homepage is also enabled.
Using the Speaker Tab
Connected Mode
Similar to other Events Management functionality, the Speaker tab uses an internet connection to run in connected mode and display the most up to date speaker information and availability. If an Internet connection is not available, a connection error message displays.
Navigating the Speaker Tab
The Speaker tab displays all speakers available to the user and includes the following components for each speaker:
- A status icon indicating the eligibility of the speaker
Icon Speaker Status 
Eligible_vod 
Expired_vod

Nominated_vod
- The speaker’s name, Speaker Identifier and Address display in the first column
- Configured columns in SPEAKER_TAB_COLUMNS_vod display on the right
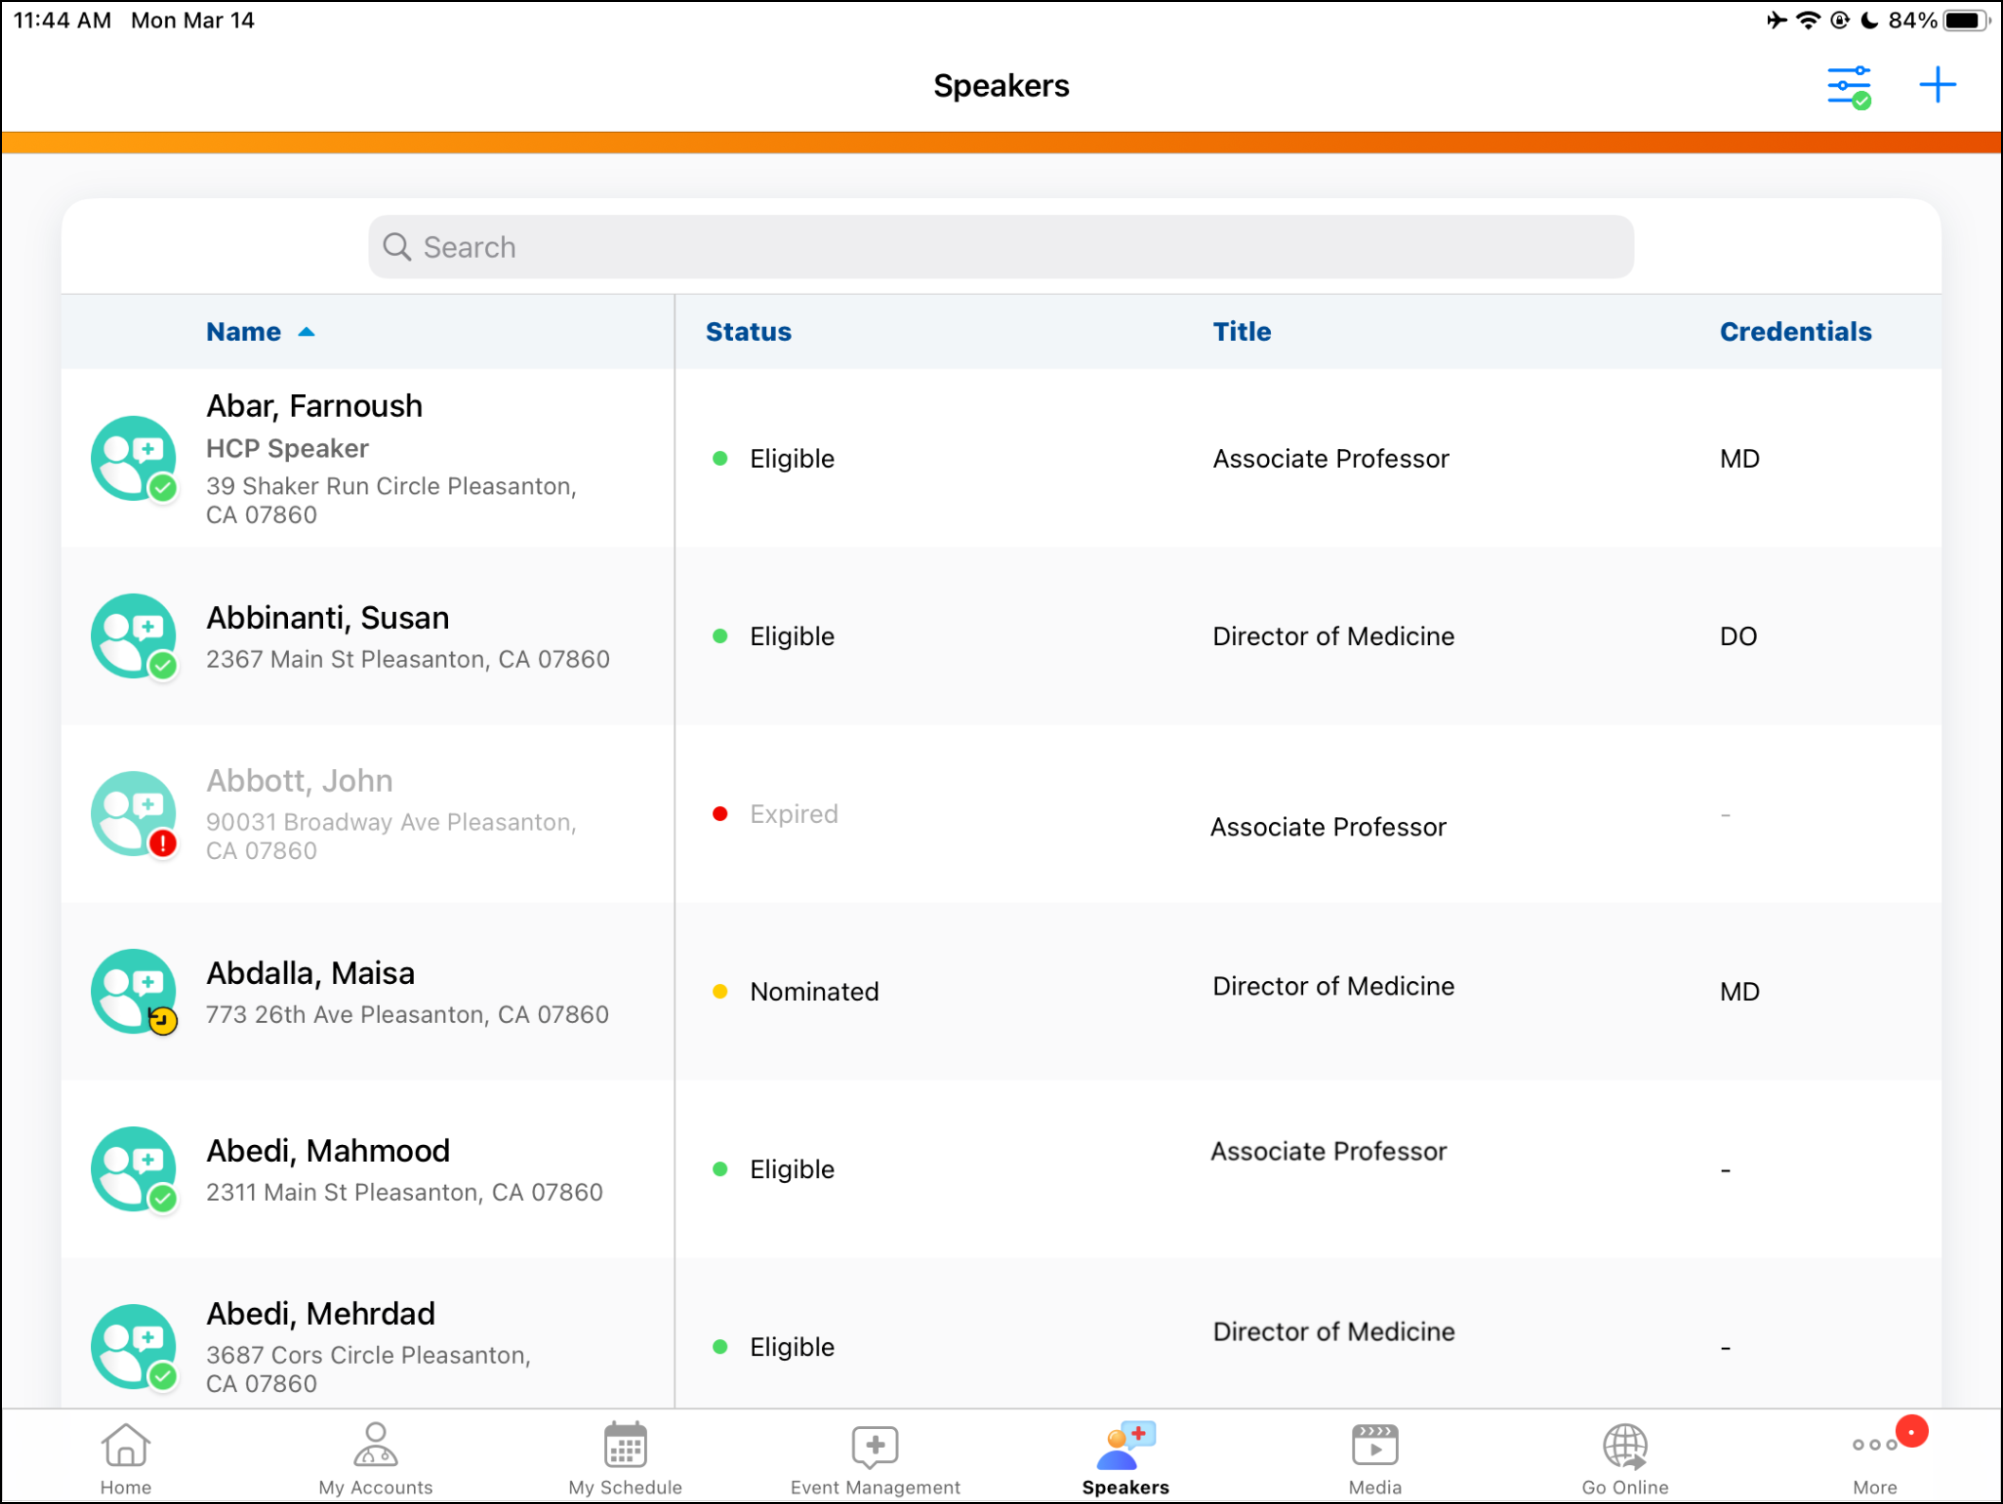
To find speakers, users can enter a search term in the Search field. The results list matches the search term against speaker data.
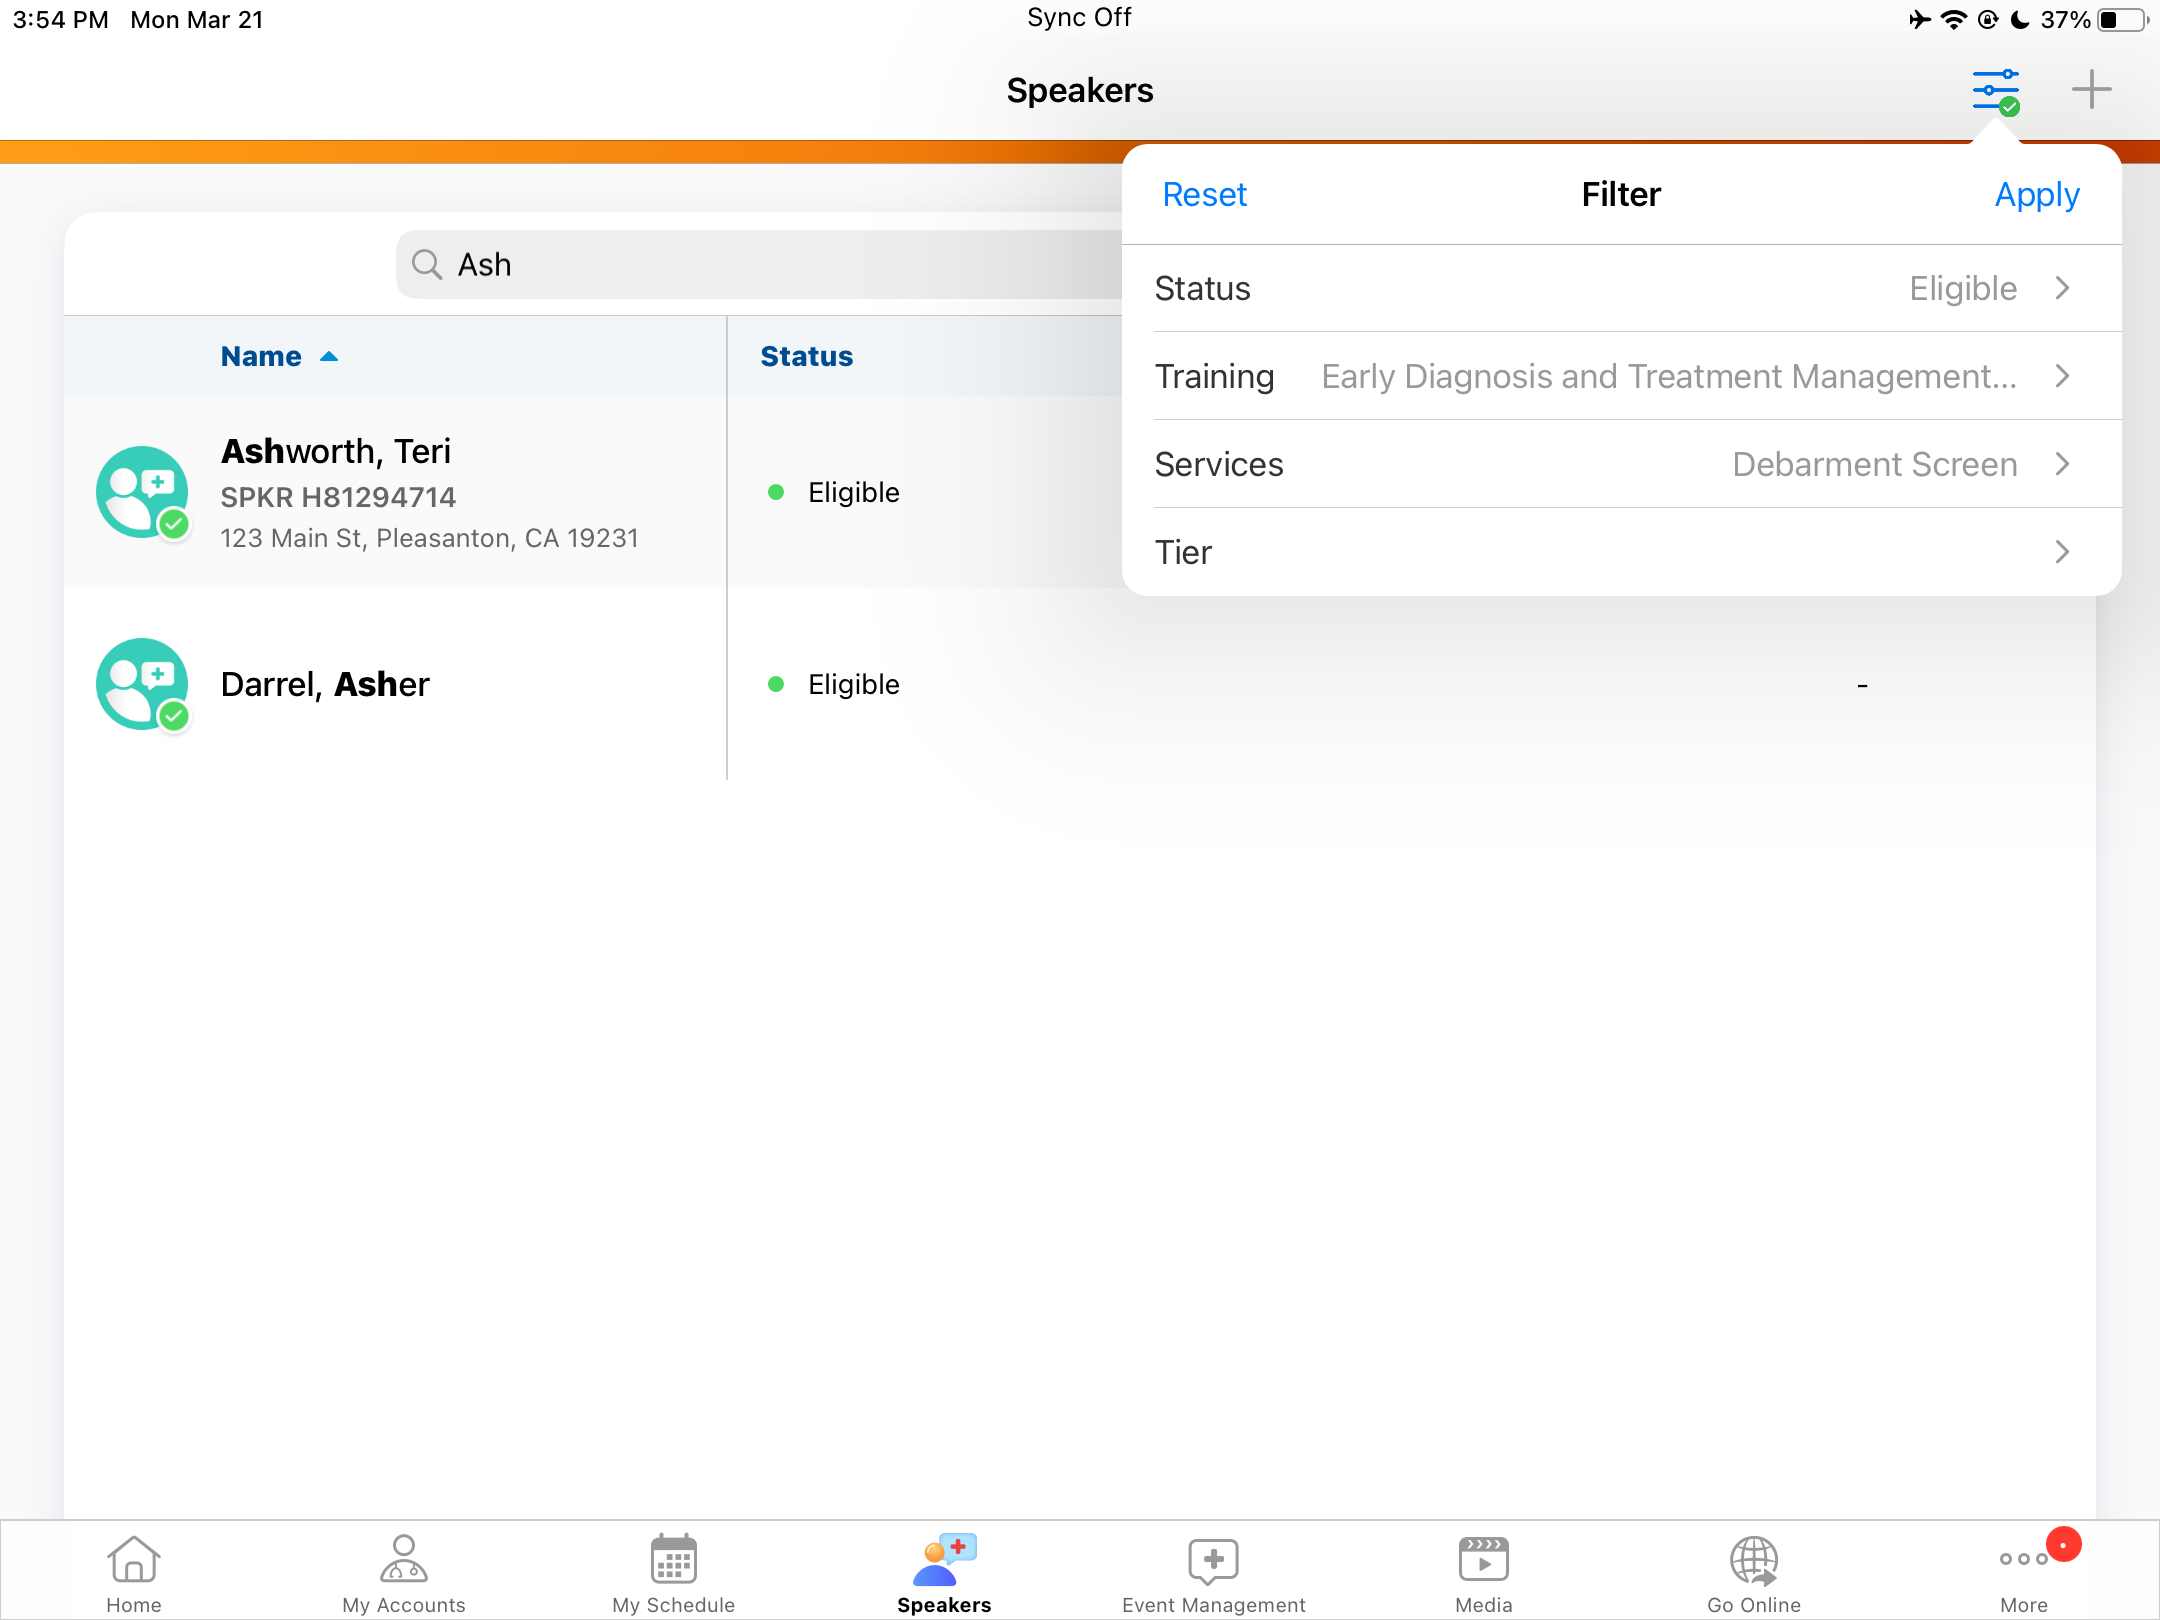
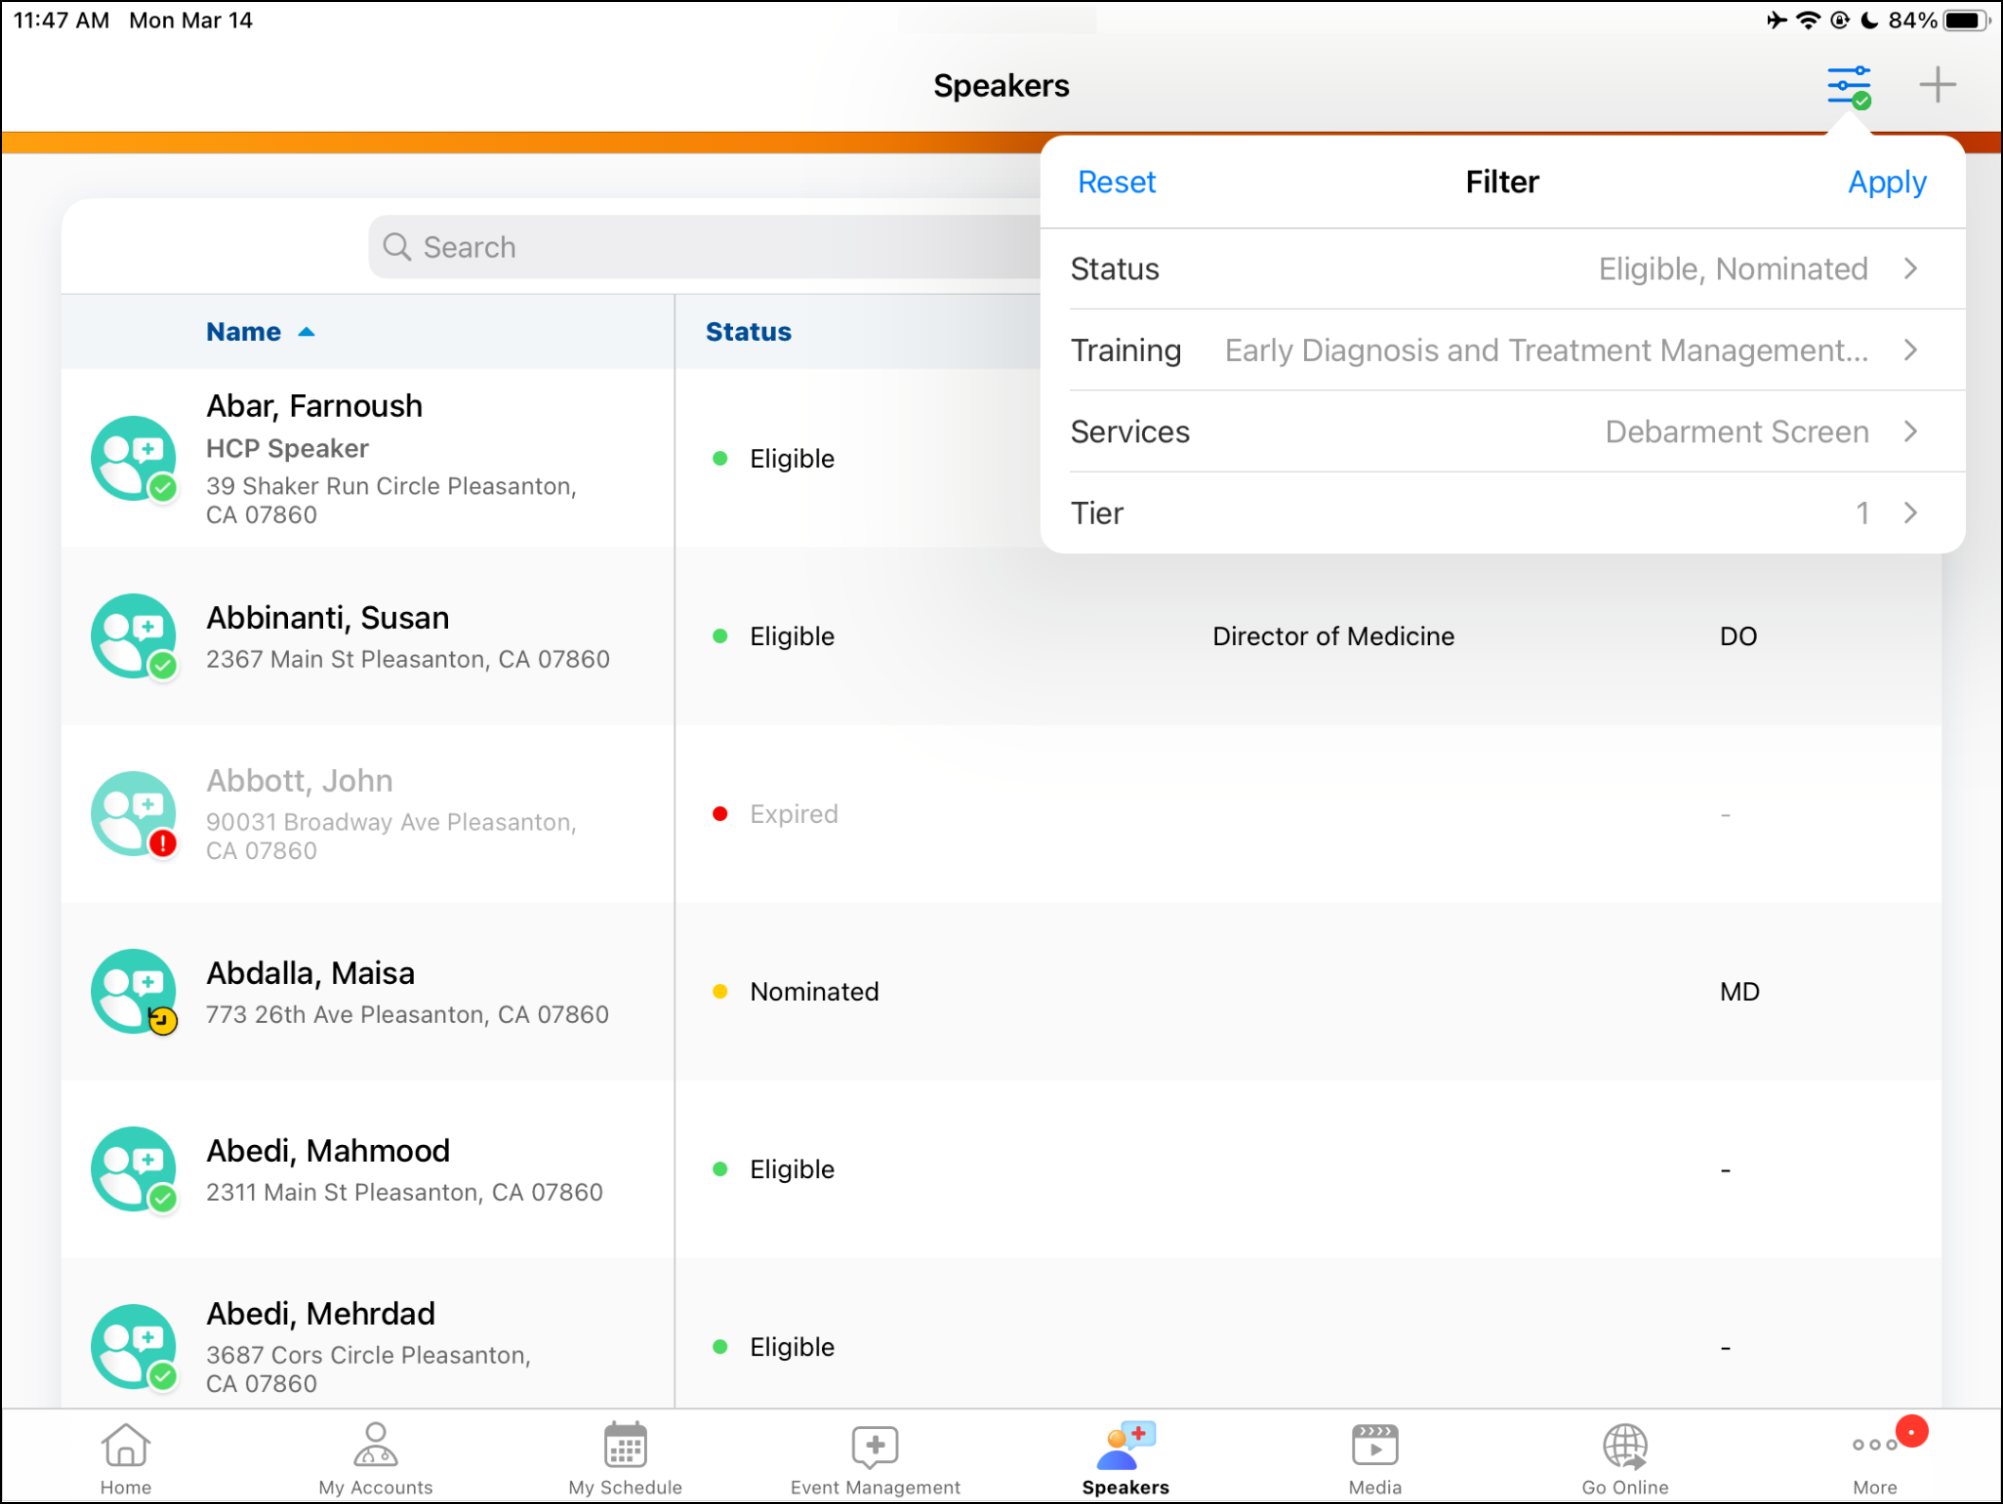
Filtering
Users can filter the list of speakers to further streamline their search. The filter applies OR logic when there are multiple filters within a group, and AND logic when there are multiple filters across groups.
There are four filter groups available:
Status - Allows users to filter for specific speaker statuses
Training - Displays EM Catalog Event_Topic_vod/General_Topic_vod records in Approved_vod status. When applied, Speakers with matching Speaker Qualification records will display. The end date of the qualification must be greater than the current date or blank to match.
Services - Displays EM Catalog Speaker_Service_vod records in Approved_vod status. When applied, Speakers with matching Speaker Qualification records will display.
Tier - Allows users to filter for specific speaker tiers based on Tier_vod__c values
Creating a New Speaker from the Speaker Tab
Users can create new speakers directly from the Speaker tab. To create a new speaker:
- Select the Add button in the upper right corner of the Speaker tab.
- Select a record type.
- Enter information in the required fields in the New Speaker screen.
- Select Save.
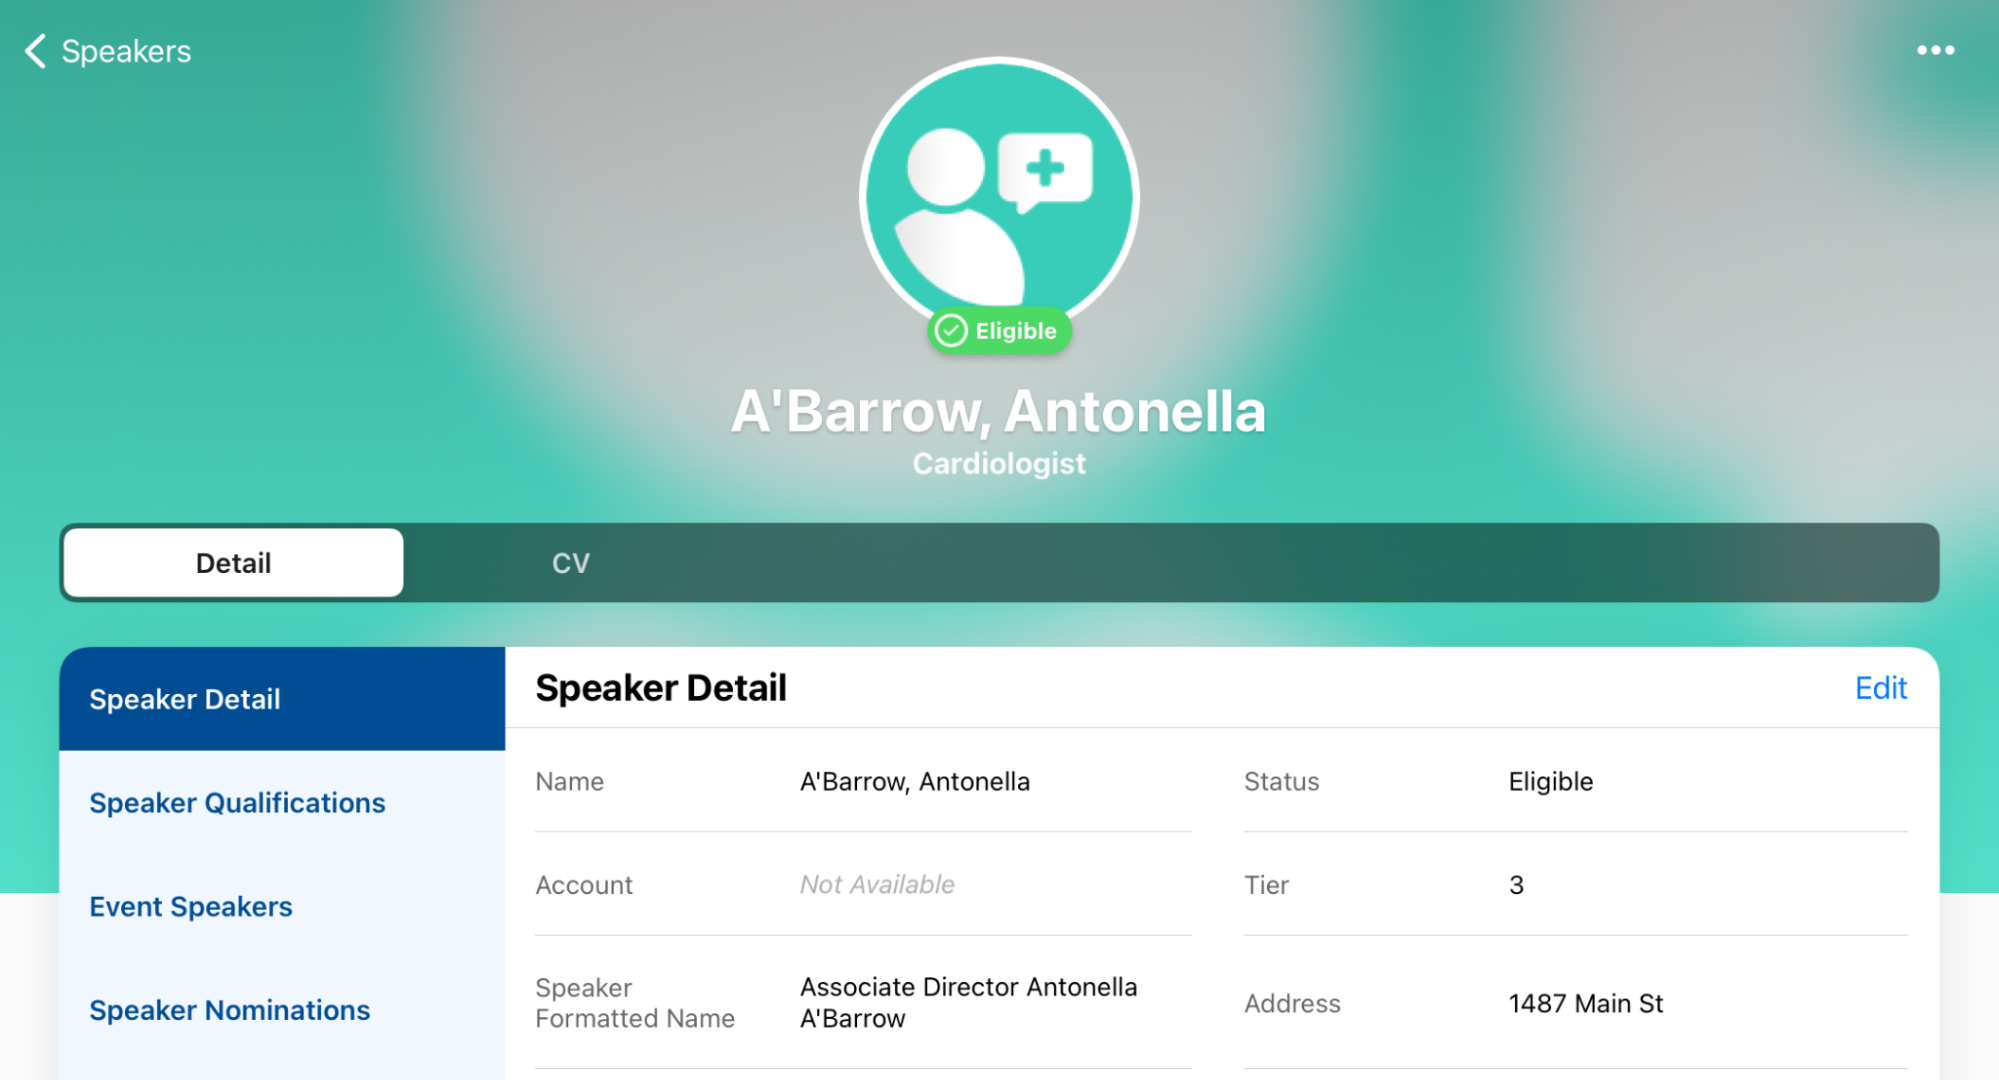
Viewing and Editing Details on the Speaker Profile
The Speaker Profile displays detailed information about the speaker, including upcoming events, speaker qualifications, and uploaded files, for example, CVs. Users can select a row to view the profile information.
From the Speaker Profile page, users can perform the following actions based on standard CRM configuration:
- Make changes to speaker information
- Access the speaker’s Account Detail page, if it is linked with an Account
- View and edit Speaker Qualifications
- View Event Speaker information, for example, any upcoming events scheduled or events completed in the past
- View and download files attached to the speaker record
- Upload new files to the speaker record
Speaker Profile Photos
- Browser
- iPad
By default speaker profiles display with a default avatar icon on their detail record page.
To help to round out the speaker profile using an interface that highlights a speaker's photo, admins can upload pictures to speaker records to serve as the speaker’s profile photo.
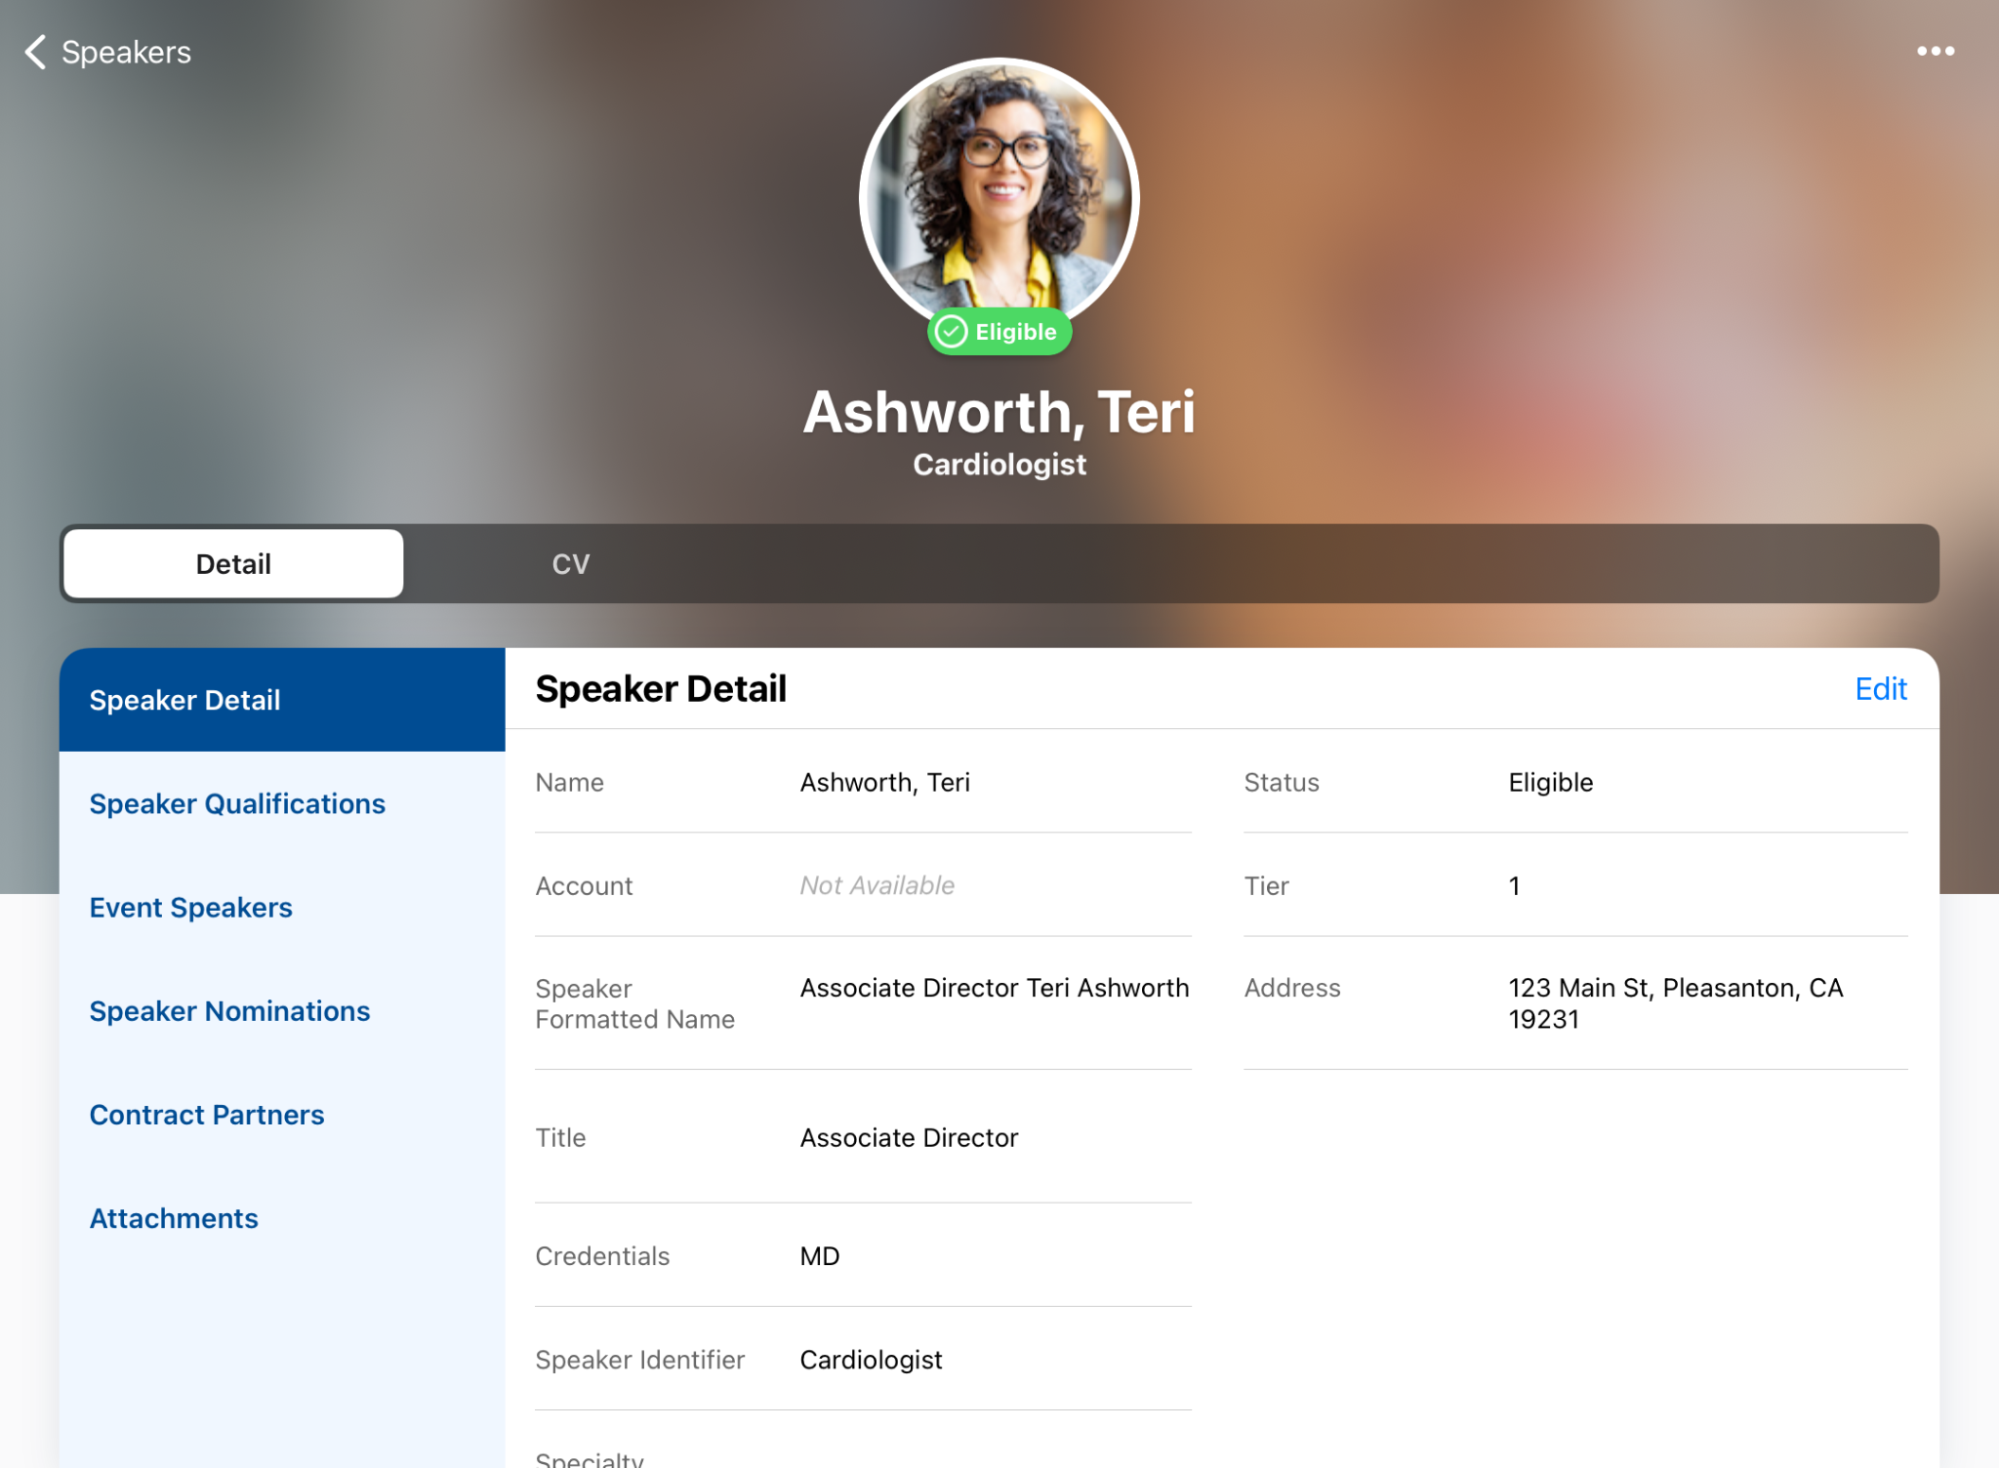
For example, Alice Adams is an admin responsible for optimizing the EM_Speaker_vod records in her org. She uploads profile pictures to each EM_Speaker_vod record to help event organizers plan their events more efficiently. Alice data loads the speaker information directly into Veeva CRM. Sarah Jones organizes meetings with Dr. Ackerman as a speaker. When Sarah navigates the Speakers tab, she quickly identifies Dr. Ackerman based on his profile photo.
Speaker Profile Photo Requirements
Profile photos uploaded to a Speaker record must meet the following requirements:
The image must have one of the following extensions:
- .jpg
- .jpeg
- .png
-
.gif
GIF files do not animate.
- The image file size cannot exceed 50KB
- The recommended image resolution is 240 x 240 pixels
Uploading a Speaker’s Profile Photo
Uploading Speaker Profile photos is only supported on the Browser (Lightning) platform.
To upload an image to a Speaker Profile:
- Ensure the CRM_Content_Type_vod field is present on the General page layout of the ContentVersion object.
- Navigate to the appropriate EM_Speaker_vod record.
- Select Upload File in the Notes and Attachments related list.
- Select the appropriate image.
- Select Open.
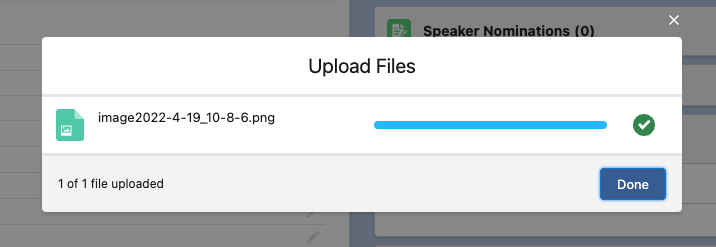
-
Select Done when the image finishes uploading.
- Select View All on the Notes and Attachments related.
- Select View File Details in the drop-down menu for the uploaded image.
-
Select the Details tab.
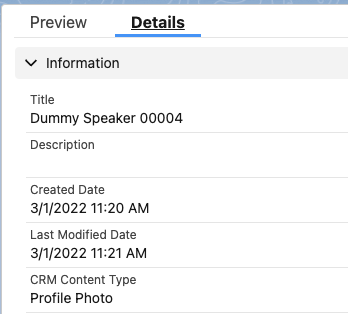
- Populate the CRM_Content_Type_vod field with Profile_Photo_vod.
- Select Save.
Profile photos are only supported when uploaded as Salesforce Files. Attachments are not supported.
Data Loading Profile Photos
Profile photos can be uploaded in bulk via data loading to Salesforce’s ContentVersion object. See the following Salesforce Help article for more information. When data loading, populate the CRM_Content_Type_vod field on the ContentVersion object with Profile_Photo_vod.
Data loading is the only way to upload profile photos on the Browser (Classic) platform.
Viewing Speaker Profile Photos
When a profile photo is defined for a speaker, the image displays in the list of speakers on the Speakers tab.
Profile photos also display on EM_Speaker_vod detail records.
